Imaging – wild camping style!
On my previous astronomical excursions, I would head off to Exmoor, do a spot of imaging and then drive home as soon as the imaging was complete.
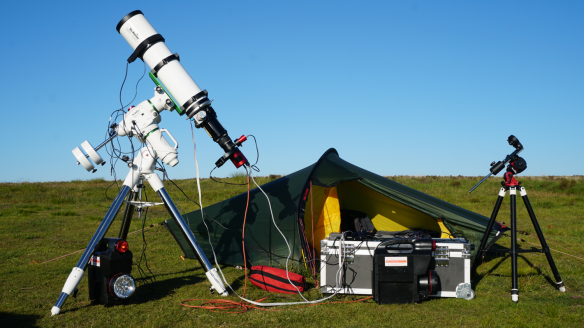
However, I didn’t really like to do this as I felt that I was pushing my endurance limits a little too far. To put a stop to this practice I decided to bring along some of my hiking kit!
Bringing the tent provided many advantages.
Firstly it gave me a place to catch up on Zzz’s immediately after the drive there. This meant that I would be fresh for the start of the imaging run. The second advantage is that I could also sleep after the imaging run, thus ensuring that I would be fresh for the drive back. The bonus side effect being that I would miss the morning rush hour traffic in Bristol!
For tonight I had two potential plans lined up…
Plan number one was to image the Cygnus Wall, with plan number two targeting the Dumb bell Nebula (M27) instead. Both of these are narrow band targets. Deep space galaxy imaging was strictly off the menu due to the moon.
There would be no truly dark skies tonight…
The Wall is a lot harder to image than M27 and requires more integration time. I figured that if things went well, I would image the Wall. If not, it would be M27 instead.
As things panned out, M27 won the lottery….
That’s not to say it was a bad night, far from it.
I had captured a lot of data, learnt a whole bunch of new things and accidently got to witness an automated meridian flip – more on this later…
In the event, the real concern for the evening was that I wasn’t getting truly round stars. It looks like that I will need to continue to iterate and improve upon my auto-guiding performance.
The intent is to go over the guiding logs over the next few days and try to work out what needs tweaking. I might even enlist the help of the highly knowledgeable PHD2 team.
But first, let’s rewind to the beginning of the night…
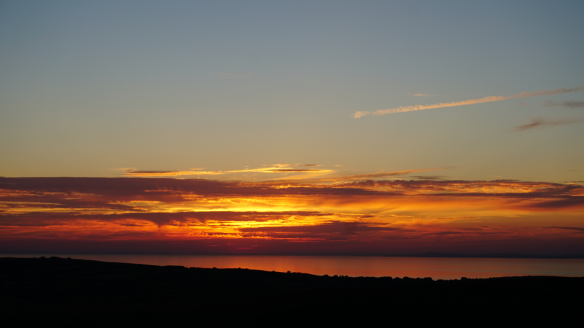
After setting up and balancing the mount, it was just a question of waiting for sunset, and what a glorious one it was too!
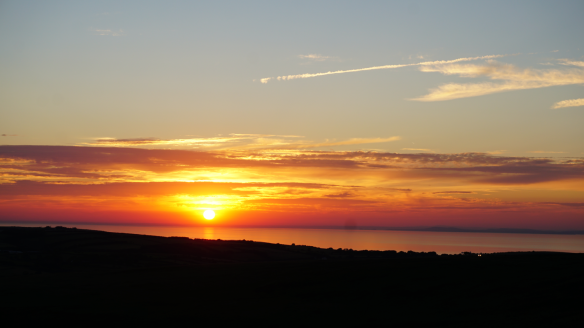
A beautiful sunset!
Normally, I’d start polar alignment at around this point. This is because the pole star starts to become visible through the polar scope. However, tonight, there would be no polar scope…

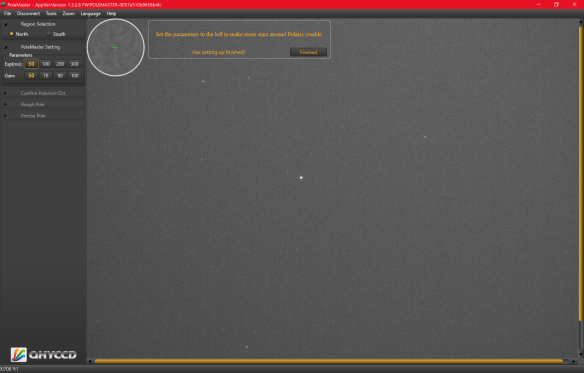
The new polar alignment camera…
The irony of using this new hi-tech method for polar alignment is that the camera was too sensitive. As a result, I had to wait until later for the skies to darken further before I could start the alignment procedure.
In the meantime, I passed the time away using my binoculars to observe the Moon, Venus and the flame coloured clouds of dusk’s sunset:
These clouds are simply amazing through a pair of binoculars!
Once it became dark enough it was straight to the computer and the mount for the polar alignment.
Polar alignment…. The modern way! No crooked necks here!
Using the PoleMaster was incredibly simple and quick. Just follow the straightforward instructions and you are aligned in around 5 minutes – absolutely incredible.
Right now, many of you are probably asking, so just how accurate is this alignment method? I’ll let the tracking graph speak for itself…
Polar alignment was pretty bang on! (Click here for larger image)
0.1 arc minutes of accuracy? In 5 minutes of setup time? I’ll take that sir! Thank you very much! 🙂
The above graph seems to show reasonable autoguiding, but if one zooms in, the picture becomes a little more complex:
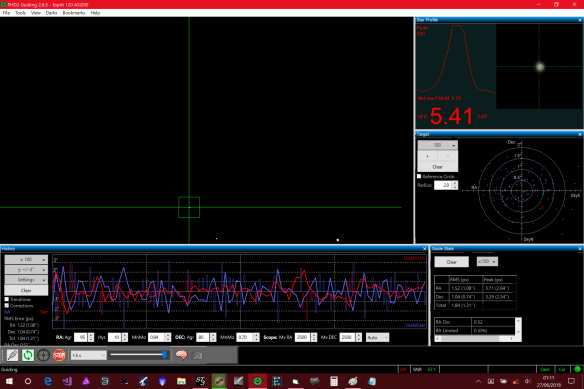
Guiding was relatively poor…
In the bottom graph there are continuous corrections to the Right Ascension axis – in both directions. An indication that the system is being way too aggressive with the result that it was always over-compensating.
Alas, there are a myriad of autoguiding settings, so this is one aspect of autoguiding performance that I will have to iteratively refine as I close in on those magic numbers. Of course, it didn’t help that I picked a saturated star as indicated by its flat top – the red graph top right.
On the plus side, the guide stars are now round, a big improvement over the coma shaped ones with my previous guide camera. Plus the new camera never lost tracking, connectivity or frame-sync. In short it proved to be a great upgrade.
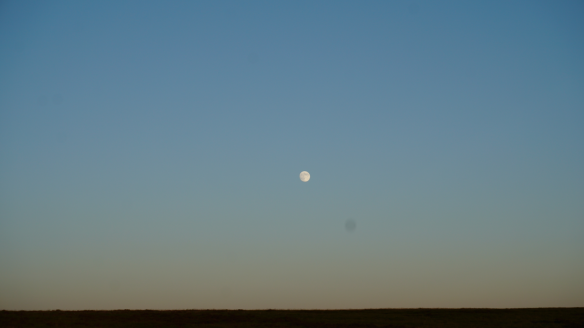
Other than the guiding, the other elephant in the room was the moon…
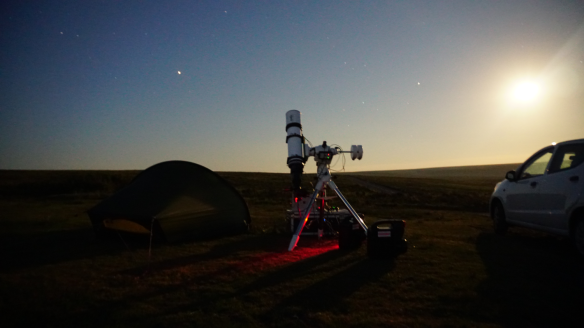
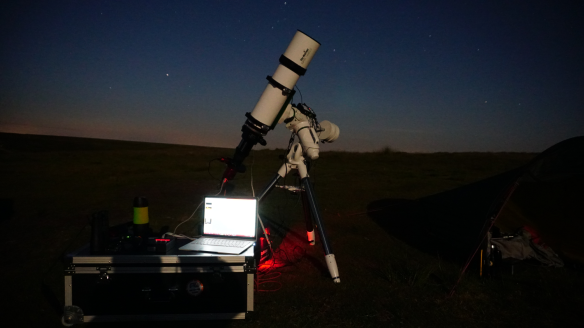
The moon was a serious source of light pollution…
The above photo shows just how much the moon was affecting the night sky. On this two second exposure it almost looks like day time! I’m really hoping the narrow band filters will help mitigate these effects, but only time will tell.
I spent most of the evening using the binoculars to observe many star clusters, plus the planets Venus, Jupiter, Saturn and Mars – not a bad haul for one evening! In addition to these observations I took the time to play with the hand held camera to see if I could get any decent night shots with it…
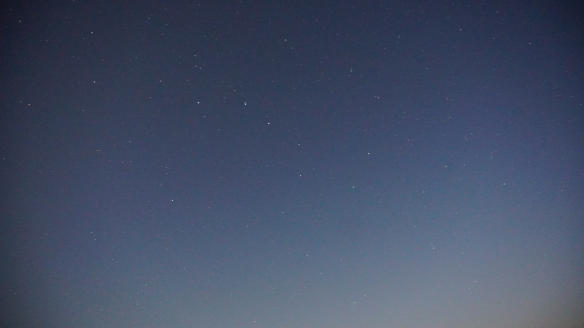
You might recognise this one…
Other than Orion, this is probably one of the most recognisable constellations in the northern hemisphere. I won’t spoil things by naming it for you! 😛
Things seemed to be going swimmingly well, until all of a sudden, out of nowhere, the mount started slewing all by itself!
I made a bee-line straight for the mount. My first concern was that the telescope was going to get driven into the mount. The second concern was trying to work out what was going on…
It turned out that Sequence Generator Pro was performing an automated meridian flip.
The mount didn’t really need this as I was near the end of the imaging run and felt that there was still plenty of mount travel left. I didn’t have the time for these mount shenanigans as the night was literally running out!
However, out of morbid curiosity I decided to monitor the whole thing very closely. In the old days, meridian flips had to be performed by hand. It’s a tough job to ask of any software, but somehow, Sequence Generator Pro delivered!
It switched the scope to the other side of the mount, automatically re-centered it perfectly on to M27, then it went on to pick a guide star and carry on, all without breaking into a sweat!
I have never seen this level of automation before, I just stood there stunned and incredulous.
Many non-astronomy readers are probably thinking what is a meridian flip?
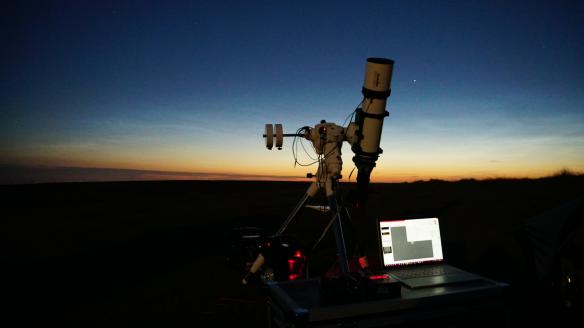
Well, take a close look at the photo below, pre-flip:
The scope pre meridian flip…
Here the telescope is on the West side of the mount with the weights to the East. It is slowly rotating clockwise and downward toward the mount so as to prevent star trailing.
Left unattended, the telescope would eventually track into and collide with the mount legs. In this case the tripod leg on the left. I didn’t think this would be an issue as I had planned the session in such a way that imaging would be complete way before the telescope got to the mount leg.
Alas, this ‘collision’ dynamic is one of the inherent flaws of the German Equatorial mount design.
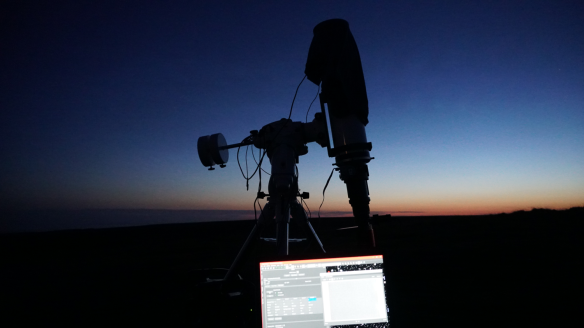
To get around this most imagers stop imaging and then move the scope to the other side of the mount as shown in the photo below – post meridian flip:
The scope post meridian flip. Compare and contrast with the previous photo…
Notice how the telescope and weights have switched position. The weights are now to the West and the telescope is now to the East. This will allow the mount to carry on following the target whilst avoiding any further contact with the mount.
Normally, this is a right royal pain to do.
Firstly, you have to manually centre the object again. Centering objects near the meridian can be tricky. In addition, if the object is not precisely centered you end up having to crop away a large part of the combined image frames.
To add further complication, the guider commands are now back to front, yet somehow, Sequence Generator Pro dealt with all of this in a fuss free manner.
I had originally planned to do an automated meridian flip under more controlled test conditions, but I guess that’s one test I can skip now 🙂
With the dawn creeping in, there was in a real danger of having to cut the imaging session short. It was all very touch and go, yet the last image got taken with literally no time to spare. Talk about cutting things fine!
After the imaging run, I set about taking the sky flats using the T-Shirt method – or in this specific case, the-t-shirt-that-I-was-actually-wearing-method, as I had forgotten to bring one for this very purpose. Let us just say it was quite cold having to remove it pre-dawn…
Taking the sky flats using the time honoured t-shirt method!
After the flats were taken I packed all the kit away and prepared for bed.

All packed up. Now ready for bed!
That’s it for this evenings’ report. I can’t show any processed images just yet, but I can share some of the raw data:
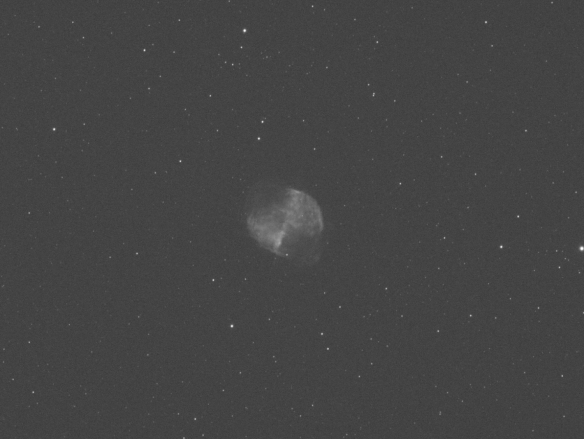
M27 the dumb bell nebula – a 1 minute exposure though a Hydrogen Alpha filter.
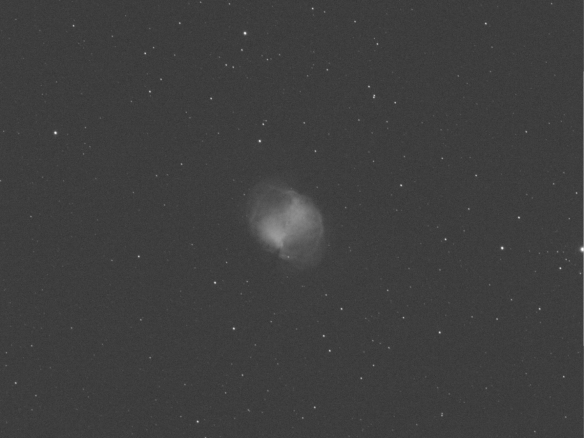
M27 the dumb bell nebula – a 1 minute exposure though a Oxygen III filter.
What got me was how different M27 looked in terms of structure through the two different filters. I was especially interested in the dark notch bottom left of the OIII image.
These nebula are formed at the end of a Red Giant’s life when the star sheds off its outer layers to become a white dwarf. I was guessing that these layers would be thrown off in a spherical manner – hence my interest in the notch. I wondered what was causing it? Maybe all will be revealed after the image processing…
Until then,
Clear Skies
RobP
